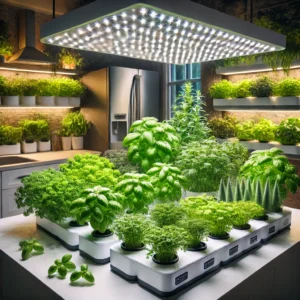
Growing strawberries from seeds can be a rewarding challenge for gardeners looking to start their plants from scratch. While most gardeners prefer to use runners or seedlings, starting strawberries from seeds allows you to explore unique varieties and enjoy the entire growth journey from seed to berry. In this guide, we’ll walk you through the steps to successfully grow strawberries from seeds indoors, including a detailed method for hydroponic systems.
This post may contain affiliate links which means I may receive a commission for purchases made through links. Learn more on my Affiliate Disclosure Page
Why Start Strawberries from Seeds?
Starting strawberries from seeds offers several benefits:
– Variety Selection: Seeds give you access to a wide range of strawberry varieties that may not be available as runners or seedlings.
– Cost-Effective: Seeds are generally less expensive than purchasing seedlings or bare roots.
– Gardening Satisfaction: Watching your strawberries grow from tiny seeds to fruitful plants is incredibly satisfying.
Choosing the Right Seeds
When selecting strawberry seeds, consider the following:
– Variety: Choose a variety suited to your growing conditions and taste preferences. Popular choices for seed starting include Alpine strawberries, which are known for their sweet flavor and compact growth. Other good choice that we grow in our own indoor garden is the Albion Strawberry.
– Quality: Purchase seeds from reputable suppliers to ensure good germination rates and healthy plants.
Step-by-Step Guide to Growing Strawberries from Seeds Indoors
1. Stratify the Seeds
Strawberry seeds require a period of cold treatment (stratification) to break dormancy and enhance germination. This mimics the natural winter conditions they would experience outdoors.
– Process: Place the seeds in a small, airtight container or a resealable plastic bag with a bit of moist sand or a damp paper towel.
– Chill: Store the container in the refrigerator for 2-4 weeks. Check periodically to ensure the medium remains moist.
2. Prepare the Seed-Starting Medium
Strawberries prefer a light, well-draining medium for starting seeds. In hydroponic systems, rock wool or oasis cubes are excellent choices.
– Rock Wool Cubes: Soak the rock wool cubes in pH-adjusted water (pH 5.5-6.0) for 30 minutes to a few hours to ensure they are ready for planting.
Grodan A-OK Rockwool starter plugs are ideal for starting seeds or rooting clone cuttings. They absorb nutrient solutions while retaining oxygen, promoting rapid growth. Supports plant needs at various stages.
– Oasis Cubes: Similarly, soak oasis cubes in pH-adjusted water to prepare them for seed starting. Oasis cubes are specifically designed for hydroponic seed starting and provide excellent moisture retention. While we have used this product successfully at GGG and appreciate its economical price, we tend to prefer Rock Wool Cubes as they seem to retain more moisture for us. Both are excellent options depending on what your needs are.
3. Plant the Seeds
After stratification, it’s time to plant the seeds in your chosen medium.
– Containers: Place the prepared rock wool or oasis cubes in seedling trays or small containers.
– Planting Depth: Sprinkle the seeds on the surface of the rock wool or oasis cubes. Do not cover the seeds with the medium as they need light to germinate.
– Watering: Mist the cubes lightly with water. Keep the medium consistently moist but not waterlogged.
4. Provide the Right Conditions
Strawberry seeds need specific conditions to germinate successfully.
– Light: Place the containers under grow lights or in a bright, sunny window. Seeds need 12-16 hours of light daily.
– Temperature: Maintain a consistent temperature of 65-75°F. A seed-starting heat mat can help provide the warmth needed for germination.
– Humidity: Cover the trays with a clear plastic lid or plastic wrap to create a humid environment. Remove the cover once the seeds germinate to prevent mold.
5. Germination and Seedling Care
Strawberry seeds can take 2-4 weeks to germinate.
– Monitoring: Keep an eye on the seedlings. Once they sprout, thin them out to ensure each plant has enough space to grow.
– Watering: Keep the medium moist but not soggy. Rock wool and oasis cubes should retain sufficient moisture, but check them regularly.
– Fertilizing: After the seedlings develop their first set of true leaves, you can start feeding them with a diluted, balanced hydroponic nutrient solution every 2-3 weeks.
Hydroponic Growing Instructions
Once your strawberry seedlings have developed a few sets of true leaves, they are ready to be transferred to a full hydroponic system. Here’s how to continue their growth in hydroponics:
1. Transfer to Hydroponic System:
– System Setup: Use a hydroponic system like NFT (Nutrient Film Technique), DWC (Deep Water Culture), or a vertical tower setup.
– Placement: Carefully place the seedlings, still in their rock wool or oasis cubes, into the net pots or growing sites of your hydroponic system.
2. Nutrient Solution:
– pH and EC: Maintain a pH of 5.5-6.5 and an EC (Electrical Conductivity) appropriate for strawberries, typically around 1.2-1.5 mS/cm.
– Nutrient Mix: Use a balanced nutrient solution designed for fruiting plants, with higher levels of potassium and phosphorus to support flowering and fruiting.
3. Lighting:
– Grow Lights: Provide 12-16 hours of bright light daily using LED grow lights to ensure strong growth and fruit development.
– Positioning: Keep the lights at an appropriate distance to avoid burning the plants while ensuring adequate light coverage.
4. Environmental Control:
– Temperature: Maintain temperatures between 60-80°F with moderate humidity. Avoid excessive heat to prevent stress on the plants.
– Air Circulation: Ensure good air circulation with fans to reduce the risk of fungal diseases and promote healthy growth.
5. Maintenance:
– Pruning: Remove any dead or yellowing leaves and excess runners to focus the plant’s energy on fruit production.
– Pollination: If grown indoors, hand-pollinate flowers using a small brush or by gently shaking the plants to transfer pollen.
Harvesting and Storage
– When to Harvest: Pick strawberries when they are fully red and ripe. Gently twist the fruit to avoid damaging the plant. Albion strawberries, like many other varieties, are typically ready to harvest 4-6 weeks after flowering and will continue to produce fruit throughout the season.
– Storage: Store fresh strawberries in the refrigerator for up to a week. For longer storage, consider freezing the berries or making them into jams or preserves.
Conclusion
Growing strawberries from seeds using hydroponic methods is an exciting and rewarding process that allows you to enjoy fresh, delicious berries all year round. While starting from seeds can be more challenging than using runners or seedlings, the variety and satisfaction make it worthwhile. Start your strawberry seeds today and look forward to a fruitful harvest!


One thought on “Growing Strawberries from Seeds: An Indoor Starting Guide”